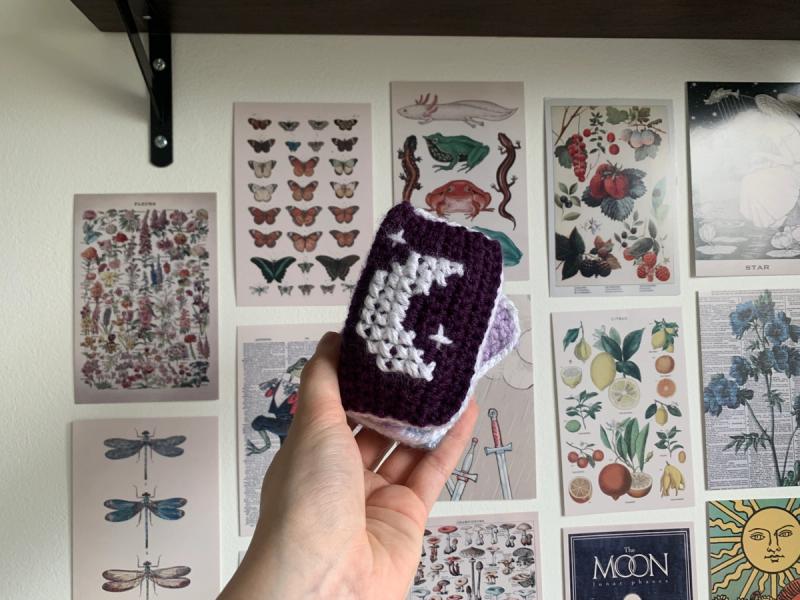
Crochet Witch's Spell Books
Make your own cute pile of celestial themed spell books this Halloween!

Materials & Tools
- Yarn: Colour A (top book colour) , Light (DK) · CYC 3 · 20g (0.7 oz)
- Yarn: Colour B (middle book colour) , Light (DK) · CYC 3 · 20g (0.7 oz)
- Yarn: Colour C (bottom book colour) , Light (DK) · CYC 3 · 20g (0.7 oz)
- Yarn: White (cross-stitch & borders) , Light (DK) · CYC 3 · 20g (0.7 oz)
- Hook: 2.5mm
- Stuffing (or yarn scraps!)
- Darning needle
The pattern
Tap a row to track your place
Refer to the graph for the cross-stitching section and use the cross-stitching guide for step by step instructions.
Abbreviations used in this pattern
| US | UK | Meaning |
|---|---|---|
| ch | ch | Yarn over, pull the yarn through the loop on the hook. |
| sc (single crochet) | dc (double crochet) | Insert hook into the stitch, yarn over, pull up a loop, yarn over, pull through both loops. |
| sl st (slip stitch) | ss (slip stitch) | Insert hook into the stitch, yarn over, pull up a loop, pull the first loop on the hook through the second. |
Main book shape
- Row 1: a) Make a slipknot and chch 17
b) scdc into the 2nd back bump from the hook
c) scdc into each back bump across
(16 sts) - Row 2-23: Turn work
Make 1 scdc into each stitch across
After completing row 23, chch 1 and fasten off (16 sts) - Cross-stitch (optional): a) fold the fabric in half to get a rectangle - the rows of crochet should appear vertical, not horizontal
b) cross-stitch the crescent moon design in the centre of the rectangle, using 4 holes on the fabric that line up as a ‘square’ shape as equaling 1 cross-stitch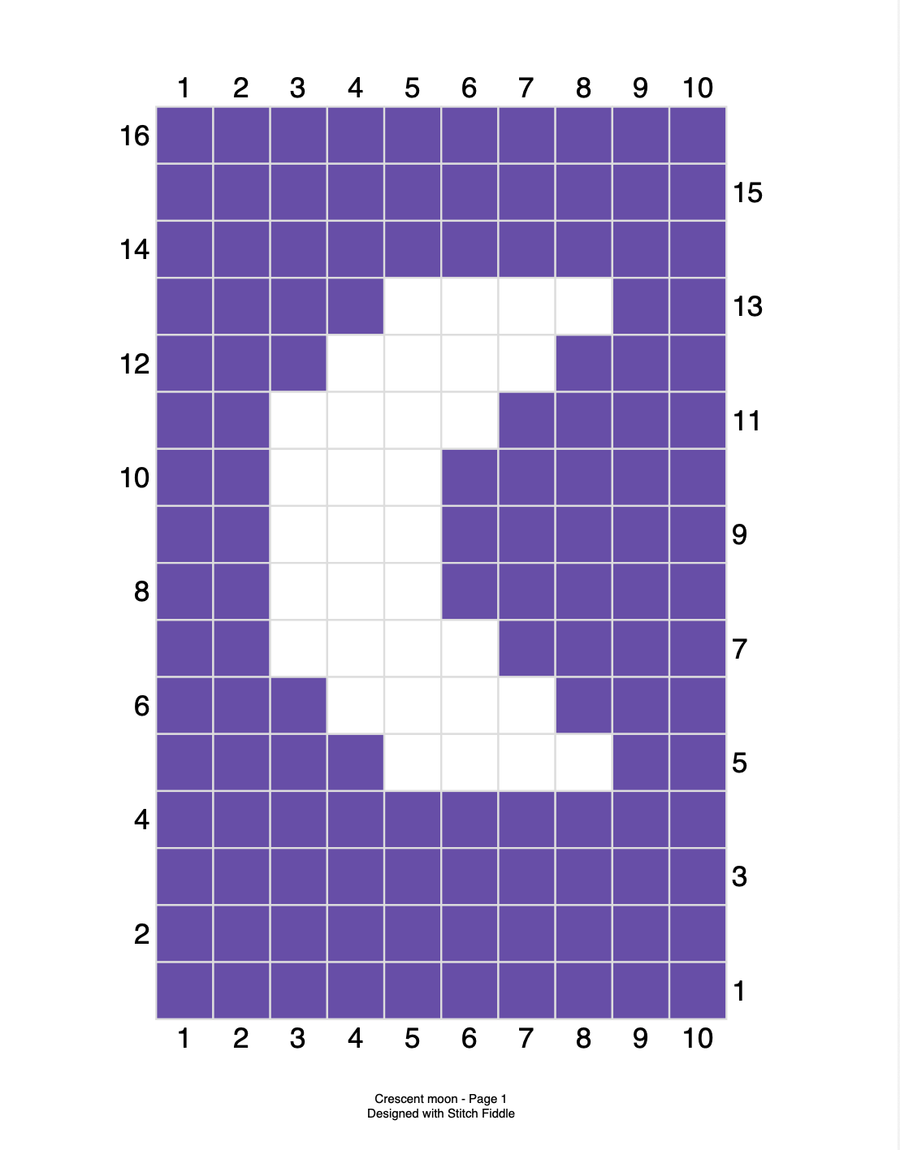
Crescent moon cross-stitch chart (10 × 16 squares) — one square = one cross-stitch - Sewing/stuffing: a) Sew through both sides of one longer edge, then along a shorter edge, then continue to sew up the other longer edge - leave the final shorter edge open.
b) Stuff the inside of the book enough to give it shape and fill out, but do not overstuff or it will appear too rounded
White border
- Row 1: With white yarn:
a) Make a slipknot and insert the hook into the top corner of the edge that is currently open and stuffed
b) Pull the slipknot through this corner space and insert the hook into the next available space along the open edge through both sides, make a slip stitch
c) Continue to make slip stitches evenly through both sides of the panels across the top, side and bottom off the border (leaving the final longer side blank)
End of row 1 (38 sts) - Row 2: Ch 1, turn work
a) sl stss back along the row of each sl stss from the previous row
After the last slip stitch, ch 1, fasten off, weave in the ends
You should now have 1 book with a celestial design completed. This book will sit on the top of the pile. Repeat the steps for book 2 and 3 in your chosen colours. Book 2 and 3 will NOT need a cross-stitch design. (38 sts)
Assembling the books
- a) Grab book 3 (which will sit on the very bottom of the pile) and book 2 (which will sit in the middle of the pile).
b) Sew book 3 and book 2 together in the centre of their ‘front covers’. If you want you can turn them slightly to create a ‘messier’ look.
c) Then grab your book 1 (with the celestial design), and sew this to book 2.