Easy Large and Mini Pumpkins
Heads up: some links in this post are affiliate links. If you buy something through one of them, I may earn a small commission (at no extra cost to you). Full details in my Privacy Policy.
Simple, easy-to-make pumpkins made from a single panel that you seam, gather, and stuff! This pattern is perfect for beginners and is the cutest addition this fall season.

Materials & Tools
- Yarn: Orange - James C Brett Second Chance DK yarn (Rust) (currently discontinued but I will link an almost identical version!) , Light (DK) · CYC 3 · 100g (3.5 oz)
- Yarn: Green (scrap amount) , Light (DK) · CYC 3 · 10g (0.4 oz)
- Hook: 2.75mm (US C-2)
- Stitch marker
- Sewing needle
- Toy stuffing or yarn scraps
- GaugeTension: Gauge is not critical
The pattern
For this pattern, I will be making the large pumpkin, but you can chain any amount to make it any size you'd like! Materials for the small pumpkin version: 25g DK orange yarn, a scrap amount of DK green yarn, 2.5-2.75 mm hook, stuffing/yarn scraps, stitch marker, sewing needle.
Abbreviations used in this pattern
| US | UK | Meaning |
|---|---|---|
| ch | ch | Yarn over, pull the yarn through the loop on the hook. |
| sc (single crochet) | dc (double crochet) | Insert hook into the stitch, yarn over, pull up a loop, yarn over, pull through both loops. |
| sl st (slip stitch) | ss (slip stitch) | Insert hook into the stitch, yarn over, pull up a loop, pull the first loop on the hook through the second. |
| st | st | stitch |
| yo sl st | yo sl st | Yarn over, insert the hook into the chain or stitch. Yarn over, and pull up a loop (3 loops on the hook). Pull the first loop on the hook through the bottom 2 loops to finish. |
Pumpkin body
- Row 1: a) Make a slipknot and chch the height you want your pumpkin to be (Ch 54 for large pumpkin) (Ch 8 for small pumpkin)
b) yo sl styo sl st into the second back bump from the hook (or 2nd ch from hook)
c) yo sl styo sl st into each back bump (or chch) across the row (53)
(53 sts) - Row 2-110: a) Turn work, yo sl styo sl st into each stst across (53)
b) Repeat row 2 until you have finished Row 110
c) After your final row, chch 1, fasten off, leave a long tail for sewing
Note: For small pumpkin: repeat row 2 until you have 18 rows total (note: you can customise the number of chs you start with and the number of rows you complete to get the desired size)
(53 sts)
Seaming and shaping
- Seam into a tube: a) Fold the panel in half so the edges meet
b) With the long tail and a sewing needle, join the edge by snaking through the inside loop of each stitch and the inside loop of its opposite, back and forth along the seam. Weave in the end (see the tutorial for visual details)
At this stage your work should look like a ‘tube’.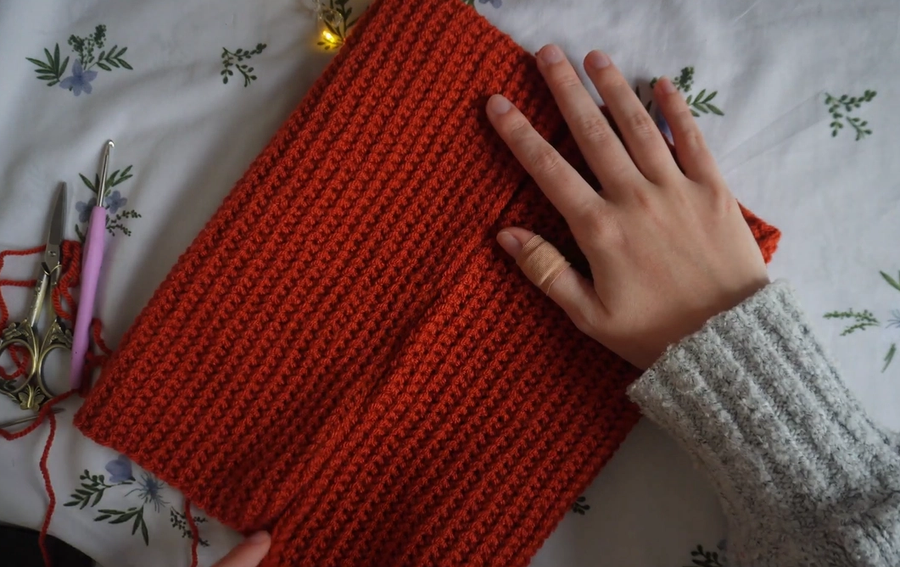
- Gathering the bottom: a) Cut a long doubled strand and knot one end
b) Weave it in and out around the bottom edge every few rows, keeping the spacing even, then when you reach the beginning, pull gently to draw the hole in. At this point there will likely be a small hole, so continue working the strands of yarn back and forth until it closes fully. Weave the end in. Flip the pumpkin back to right-side out.
Please see the tutorial for visual details if necessary. - Stuffing: Stuff the pumpkin with plenty of toy stuffing or yarn scraps to fill it out.
Stalk
- Round 1: a) Make a slipknot and chch 4, sl stss into the 4th chain to make a ring
b) Make 12 scdc into the ring, working the stitches over the yarn tail to create a drawstring as you go
c) Pull the tail to close the hole, and place your stitch marker in the last stitch
Note: you can customise the number of scdc you do for round 1. For the small pumpkin I reccomend 5making stitches. (12 sts) - Round 2-9: a) Make 1 scdc into each stst around
b) After round 9, fasten off leaving a long tail.
Note: For the small pumpkin, I reccomend doing 4-5 rounds, but you can customise this based on your preference. (More rounds = a longer stalk) (12 sts)
Spiral curl
- Row 1: a) Make a slipknot and attach this anywhere on the stalk
b) Ch 24 (adjust this number if you want the stalk longer/shorter)
c) Insert the hook into the 2nd back bump from the hook (or 2nd ch), make 2 scdc
d) Make 2 scdc into each back bump (or ch) across
e) Once you have completed the last scdc, sl stss into the stalk again
Ch 1, fasten off, weave in any ends. (46 sts)
Finishing
- Finishing: a) Double strand a long tail of yarn, and sew the tip exactly like the bottom: weaving back and across the edge, draw it in and sew the remaining hole closed
b) Sew the stalk to the top of the pumpkin, leaving the spiral curl to hang loosely on top. Weave in any ends.
Note: if you want a more obvious indent shape on the pumpkin, after drawing in the yarn, bring the sewing needle down through the pumpkin to the bottom. Pull down tight (creating the indent) and make a knot through a stitch at the bottom to fix it in this position. Then, bring the needle back up to the top of the pumpkin and close the remaining hole. Then sew the stalk to the top as normal.
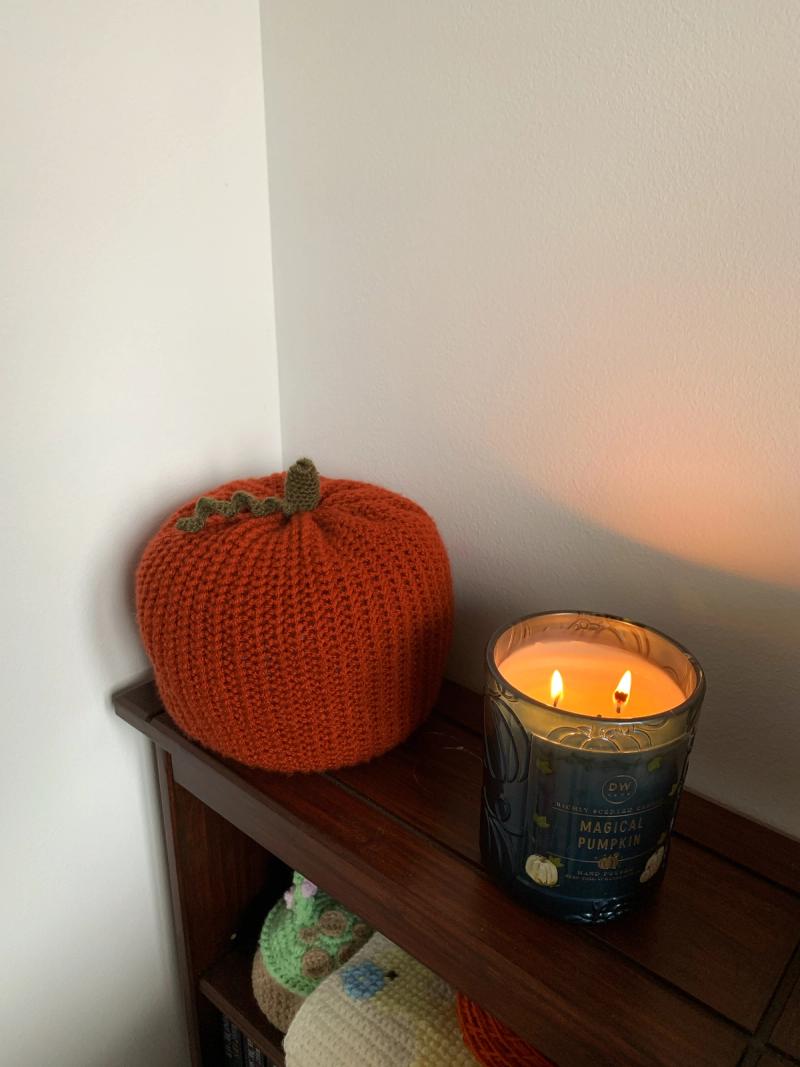
Video tutorial
Frequently asked questions
How do I change the size?
The chain is the height of the pumpkin, and the number of rows is the width (the large pillow shown is a chain of 54 and 110 rows). Chain less and work fewer rows for small pumpkins; the stalk and spiral scale by working fewer stitches into the ring and fewer chains.
What is a yarn-over slip stitch?
A cross between a slip stitch and a half double crochet: yarn over, insert your hook, yarn over and pull through so there are now three loops on the hook, then pull the first loop through the bottom two.
Which hook should I use?
I used a 2.75mm because it created tighter stitches to stop stuffing from showing through the fabric. But if a larger hook (say 3-4 mm) works when your tension is typically tight, use this.